


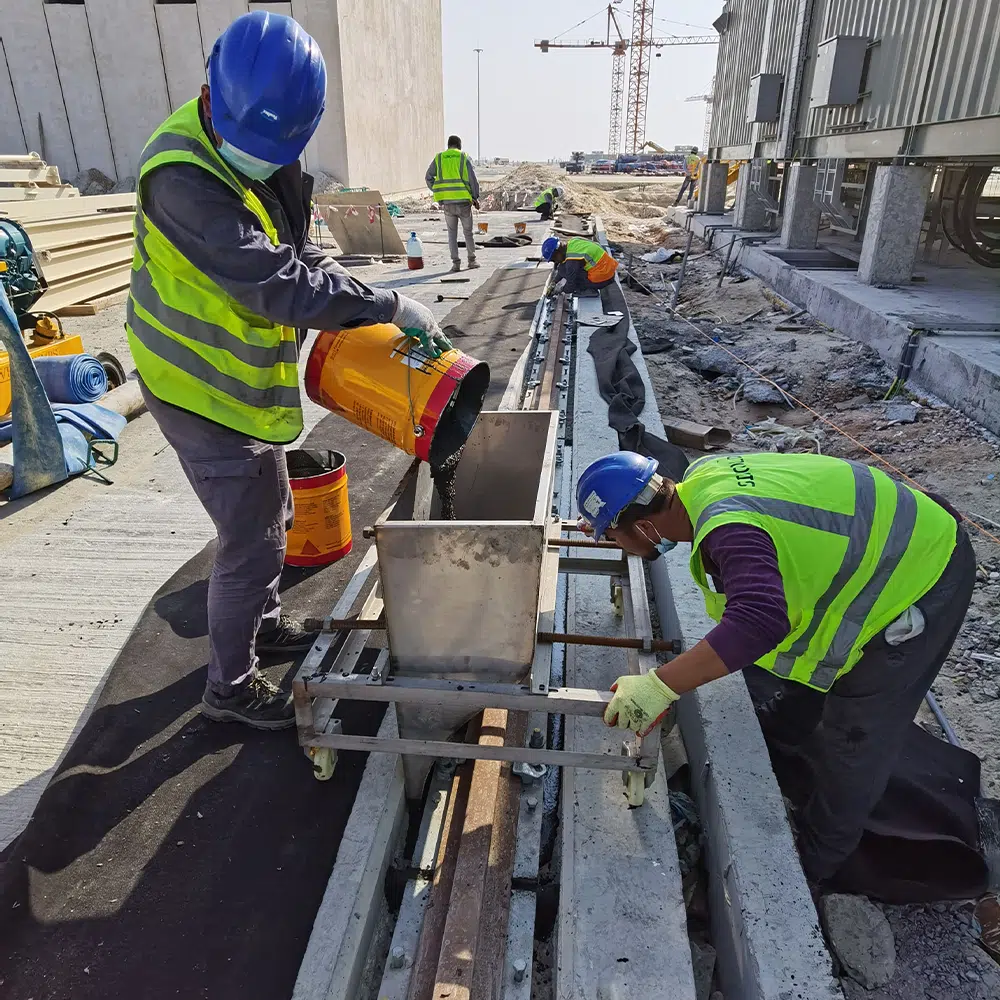
Rail foundation grouting is a precision operation. The grout layer transfers crane and rail loads from the base plate to the concrete foundation, so a poorly executed pour directly affects track stability.
This guide follows GB 50204-2015 (2017 edition) and ForgeSail grouting product specifications. Read it fully before starting and follow every step on site.
Here are the 7 proven rail foundation grouting steps every crew should execute.
1. Surface Preparation: The First Step in Rail Foundation Grouting
Roughen the foundation surface with chiselling. Remove crushed stone, laitance, dust, oil, grease, release agents, and other contaminants.
Thoroughly saturate the surface 24 hours before grouting. Remove all standing water 1 hour before placement.
A clean, damp, rough surface is the foundation for a strong rail foundation grouting bond.
2. Formwork Erection: A Critical Rail Foundation Grouting Step
Erect formwork to the grouting drawings. Seal joints between formwork and foundation, and between panels, with cement paste or adhesive tape so the assembly is watertight.
Leave about 100 mm of horizontal clearance around the equipment base plate for grout flow.
Set the formwork top about 50 mm above the top surface of the base plate.
Promptly seal any leakage during placement.

3. Water Ratio: The Rail Foundation Grouting Quality Control Point
Use the water ratio from the product specification: 13% to 14% for general reinforcement grout and 9% to 10% for pea-gravel reinforcement grout.
Mechanical mixing is recommended for 1 to 2 minutes. Hand-held drill mixers are prohibited.
For manual mixing, add two-thirds of the water, mix for 2 minutes, then add the remaining water and mix until uniform.
Size each batch to the consumption rate and use the mixed grout within 40 minutes. Never add admixtures or additives on site.
Consistent water ratio is the most common rail foundation grouting quality control point.
4. One-Side Placement: The Correct Rail Foundation Grouting Method
For long rail or equipment foundations, place grout in sections. Grout from one side, or from multiple points on two adjacent sides, until grout overflows from the opposite side.
Grouting from all four sides simultaneously is prohibited because trapped air cannot escape.
Work continuously without interruption and keep the total placement time as short as possible.


5. Secondary Grouting Rules for Rail Foundation Grouting
Secondary grouting fills the void between the base plate and foundation after anchor bolts are aligned and tightened.
Vibration is strictly prohibited during placement. If flow assistance is needed, use a grouting booster to push grout along the bottom of the layer.
Never push or disturb the grout from the middle or upper part of the layer, which can trap air and create weak zones.
When the grout layer exceeds 150 mm, use pea-gravel reinforcement grout. For large volumes, mix by mechanical means.

6. Chamfering: An Essential Rail Foundation Grouting Finish
Within 3 to 6 hours after placement, cut a 45-degree chamfer outward along the edge of the base plate to prevent free-end cracking.
Where chamfering is not practical, finish the grout surface smooth with a trowel within 3 to 6 hours.
Trim excess grout within the same window, before the material hardens, using a trowel or shovel.
7. Curing: The Final Rail Foundation Grouting Requirement
Cover the grout surface with wet straw bags or rock wool blankets within 30 minutes of completion. In hot or windy conditions, cover within 15 minutes.
Keep equipment idle for 24 to 48 hours to avoid vibration disturbing the hardening grout. Extend this period in cold weather.
Formwork removal and curing duration depend on daily minimum temperature, as shown below.
| Daily Minimum Temperature (°C) | Formwork Removal (h) | Curing Duration (d) |
| −10 ≤ T < 0 (winter plan only) | 96 | 24 |
| 0 ≤ T < 5 | 72 | 10 |
| 5 ≤ T < 15 | 48 | 7 |
| T ≥ 15 | 24 | 7 |
Note: the −10 to 0°C row applies only under an approved winter construction plan. Grouting is not recommended below −5°C.
Winter curing must comply with GB 50204-2015 (2017 edition).
Conclusion
Rail foundation grouting determines the long-term stability of crane runways and rail foundations. Surface preparation, formwork sealing, water ratio, placement direction, chamfering, and curing all matter.
Follow the 7 proven steps above, respect the product specification, and record batch and weather data for traceability.
ForgeSail supplies certified crane rail systems and grouting support. Contact our engineering team for project-specific rail foundation grouting guidance.
References
- GB 50204-2015 (2017 Edition) — Code for Construction Quality Acceptance of Concrete Structures
- ForgeSail track grouting material product specification (takes precedence on product-specific values)