


Understanding Thermite Welding Safety Hazards
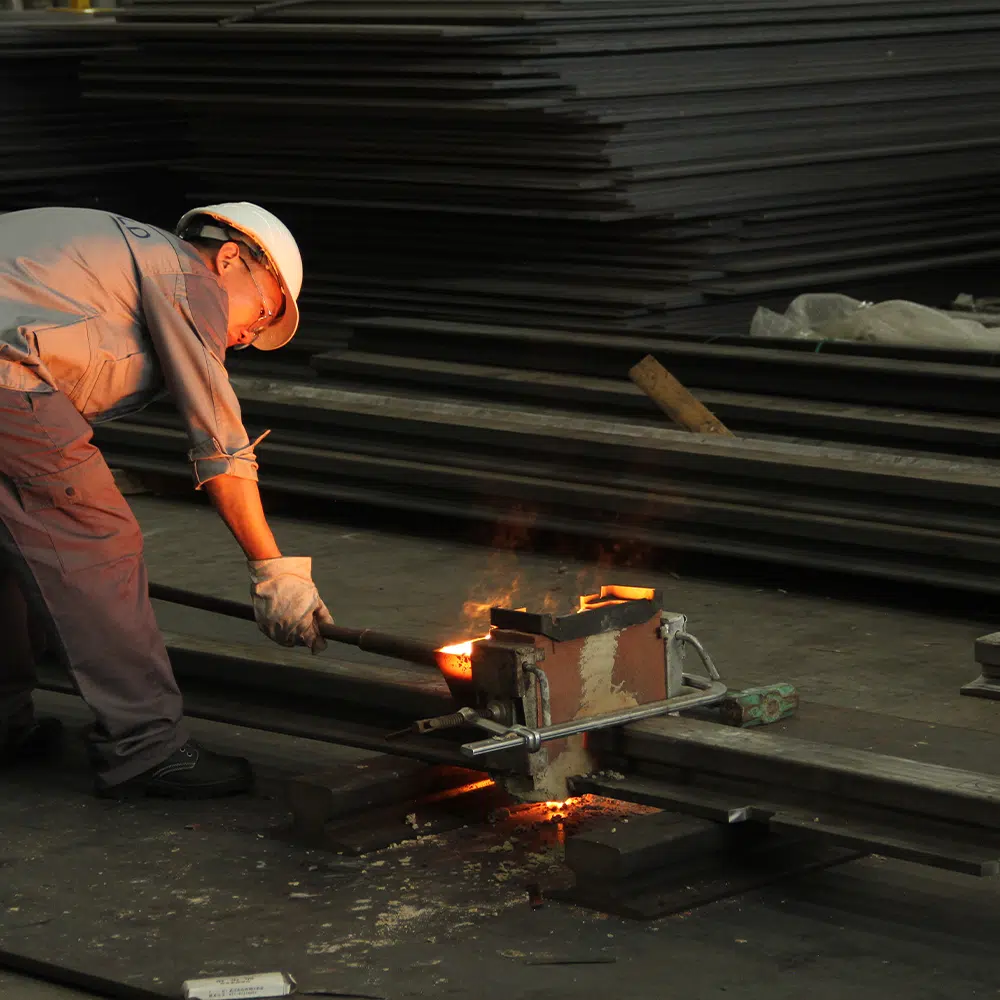
Thermite welding for rail applications involves a chemical reaction reaching approximately 2,500 °C, producing molten steel at temperatures far above typical arc welding. The thermite reaction is self-sustaining once ignited — the operator cannot stop it midway. This makes thermite welding safety fundamentally different from other welding processes: the hazard is concentrated into a short, high-energy event that requires rigorous pre-planning and strict adherence to PPE and procedures.
The primary hazard categories are:
| Hazard | Risk | Control Measure |
| Thermal (2,500°C reaction) | Severe burns, clothing ignition | FR clothing, heat shield, minimum 3 m exclusion zone |
| Molten metal splash | Eye injury, skin burns | Welding helmet Shade 10+, leather gauntlets, full coverage |
| Fume inhalation (Al₂O₃, metal oxides) | Respiratory irritation, metal fume fever | P2/P3 respirator, outdoor work preferred, forced ventilation if indoors |
| Crucible failure | Uncontrolled molten metal release | Pre-use crucible inspection; never reuse crucibles |
| Fire | Ignition of surrounding combustibles | Class D fire extinguisher, remove combustibles within 10 m radius |
| Oxygen displacement (confined space) | Asphyxiation risk | Fume accumulation (Al₂O₃) + oxygen depletion. Never perform thermite welding in confined spaces without forced ventilation and air monitoring |
This guide covers the essential thermite welding safety procedures for rail welding operations, based on industry best practices and regulatory standards. For the complete welding process, see our aluminothermic welding guide.

Thermite Welding Safety: Required PPE for Operators
All personnel within the exclusion zone during thermite welding must wear the following minimum PPE. The welding operator requires additional specialized protection.
Minimum PPE for all personnel within 10 m:
- Safety glasses with side shields (under helmet)
- Welding helmet with shade 12 minimum (shade 13 recommended) filter lens (operator only)
- Fire-resistant (FR) clothing — 100% cotton or FR-rated materials. Polyester, nylon, and other synthetic fabrics must not be worn: they melt onto skin at high temperatures
- Leather welding gauntlets extending beyond the wrist (operator)
- Heat-resistant gloves (assistants handling pre-heated equipment)
- Steel-toe safety boots
- P2 or P3 particulate respirator (N95 minimum; P3 recommended for outdoor, P3 mandatory for indoor)
- Hard hat with chin strap
FR clothing must cover all exposed skin. Shirt collars must be buttoned, sleeves down, and pants worn over boot tops to prevent molten metal from entering footwear.
ForgeSail supplies aluminothermic welding kits including all consumables, but PPE must be sourced to local regulatory standards.
[ 插入图片: Labeled diagram showing the required PPE setup for thermite welding: helmet, FR suit, gauntlets, respirator, boots. ]
Alt 属性: “thermite welding safety PPE diagram required equipment labeled”
Thermite Welding Safety Checklist: Pre-Weld Inspection
The following checks must be completed before any thermite welding operation begins. A signed safety checklist should be maintained for each weld.
Site preparation:
- Clear all combustible materials within a 10 m radius of the weld site
- Position a Class D fire extinguisher (metal fires) within arm’s reach of the welding operator. Class ABC extinguishers are not effective on thermite reactions
- Verify adequate ventilation — outdoor operations preferred. For indoor work, ensure forced ventilation is operational and positioned to draw fumes away from personnel
- Post warning signs and barricade the exclusion zone. Only essential personnel should remain within the 10 m radius
- Check weather conditions: do not weld during rain. In high-humidity conditions or when rail surfaces show condensation, the rail ends must be thoroughly dried by extended preheating before welding, high wind (≥6 on Beaufort scale, ~39 km/h or 10.8 m/s). If wind exceeds 5 Beaufort (~30 km/h), erect a wind shield before welding, or extreme heat (>40 °C), or rail temperature below 5 °C (cold cracking risk)
- Confirm a first aid kit and emergency eyewash are available on site. Verify that the crane or rolling stock on the affected track is locked out (LOTO) per OSHA 29 CFR 1910.147 to prevent movement during welding
Equipment inspection:
- Visually inspect the crucible for cracks, spalling, or previous damage. Never reuse a crucible — each crucible is designed for single use only
- Verify the thermite powder charge is within its expiry date and the packaging is intact
- Check that the mold is dry (moisture in contact with molten metal causes steam explosion)
- Inspect the ignition source (magnesium strip or electronic igniter) is functional and that the operator has a backup ignition method
- Ensure all cooling equipment (mold clamps, post-heat covers) is ready before ignition
Refer to OSHA 29 CFR 1910 Subpart Q for regulatory requirements on welding, cutting, and brazing.

7-Step Safe Thermite Welding Procedure
The following procedure must be followed in sequence. Each step has specific safety requirements that must not be bypassed.
Step 1: Mold Installation
Position the mold around the rail joint. Ensure the mold halves are aligned and clamped securely. Check that the mold gap matches the specified joint gap (typically 25-28 mm for rail profiles). Verify the mold is dry — any moisture will vaporize on contact with molten steel and can cause an explosive ejection of the weld pool.
Step 2: Preheating
Preheat the rail ends and mold using the specified gas torch for the required duration (typically 5-10 minutes depending on rail profile). Preheating removes residual moisture and ensures proper weld fusion. The preheating operator must wear heat-resistant gloves and maintain a safe distance from the gas torch flame.
Gas cylinder safety: Propane or oxy-fuel cylinders used for preheating must be positioned upright at least 3 m from the weld area, secured against tipping, and fitted with flashback arrestors. Cylinders must not be exposed to direct heat from the thermite reaction. Shut off cylinder valves when preheating is complete.
Step 3: Crucible Placement
Place the crucible over the mold. Verify the crucible is seated correctly and the gap between crucible outlet and mold inlet is sealed with sand. The operator must not reach under the crucible during placement.
Step 4: Ignition
Ignite the thermite charge using the magnesium strip or electronic igniter. The operator’s welding helmet must be lowered before ignition. The operator must not lean over or look directly down into the crucible opening. All non-essential personnel should step back to the exclusion zone boundary. Once ignited, the reaction is self-sustaining and cannot be stopped — maintain position and do not approach the crucible.
Step 5: Reaction and Pouring
The thermite reaction completes in approximately 20-30 seconds. During this time, the operator must remain at a safe distance (minimum 3 m from the crucible). DO NOT approach the crucible during the reaction. Wait until the reaction has visibly stopped before proceeding.
Step 6: Cooling
After the pour is complete, allow the weld to cool for the specified time (typically 3-5 minutes for removal of the pouring basin, 10-15 minutes for full mold removal). The weld area remains at extreme temperature — do not touch any metal surfaces without heat-resistant gloves.
Step 7: Mold Removal and Post-Heating
Remove the mold and pouring basin using tools — never by hand. Inspect the weld visually. Apply post-heat cover if specified. The rail should not be loaded until the weld has cooled to ambient temperature, which may take 30-60 minutes depending on rail profile and ambient conditions.
Thermite Welding Safety: Post-Weld and Emergency Procedures
Post-weld safety is as important as the welding operation itself. The weld area remains hazardous for up to 60 minutes after the pour.
Post-weld exclusion zone:
- Maintain the exclusion zone until the weld has cooled to <100 °C (no steam when water is applied)
- Post warning signs: HOT WELD — DO NOT TOUCH
- Deposit used crucibles and slag in a designated metal container with a lid. Do not dispose of in general waste until fully cooled (minimum 4 hours). Place the container away from combustible materials and in a clearly marked location
- Inspect the area for any molten metal splatter or ignition of nearby materials before leaving the site
Emergency response:
- Thermite reaction cannot be extinguished — wait for the reaction to stop and the molten steel to pour. Only after pouring is complete may dry sand be applied to cool the slag and residues. DO NOT pour sand onto the crucible during the active reaction — this can cause molten metal ejection. DO NOT use water — water on molten thermite causes a steam explosion that can eject molten metal
- Class D fire extinguisher only (dry powder type designed for metal fires)
- Personnel burns: cool the affected area with running water for at least 10 minutes. DO NOT attempt to remove clothing that has adhered to the burn — cut around it. Cover with sterile dressing (non-fluffy), seek medical attention immediately. For deep burns, do not apply prolonged cold water — risk of hypothermia
- Fume inhalation: move affected personnel to fresh air. If symptoms persist, seek medical attention
- All accidents and near-misses must be reported and investigated
Compare thermite welding with flash butt welding safety requirements in our flash butt vs thermite welding guide.
Thermite Material Storage and Handling
Safe storage of thermite welding materials is a critical part of overall thermite welding safety management:
- Store thermite powder in a cool, dry environment (5-35 °C, <60% humidity). Moisture contamination can cause the powder to degrade or react unpredictably
- Keep thermite powder and ignition materials (magnesium strips) in separate, labeled containers
- Thermite powder has a typical shelf life of 12-24 months. Expired material must be disposed of according to the manufacturer’s instructions — never incinerate or mix with other waste
- Transport thermite materials in approved containers with hazard labeling
- Maintain a material inventory log including batch numbers and expiry dates
Frequently Asked Questions
What is the biggest safety risk in thermite welding?
The uncontrolled release of molten metal — either through a crucible failure, wet mold (steam explosion), or the operator approaching the crucible during the reaction. The thermite reaction cannot be stopped once ignited, so prevention through rigorous pre-weld inspection is the primary safety strategy.
Can thermite welding be performed in wet weather?
No. Moisture in contact with molten thermite produces an instantaneous steam explosion that can eject molten steel over a 10 m+ radius. Thermite welding must not be performed during rain, snow, or on wet rails. The mold and rail ends must be confirmed dry before ignition.
How long should the weld area be cordoned off?
The exclusion zone should be maintained until the weld area has cooled below 100 °C. For standard rail profiles, this typically requires 30-60 minutes after the pour. Post warning signs and restrict access during this period.
What type of fire extinguisher is needed for thermite fires?
Only Class D fire extinguishers (dry powder, designed for combustible metal fires) are effective. Standard ABC extinguishers, water, or foam must not be used — they will not extinguish the thermite reaction and water can cause a steam explosion.
Can expired thermite powder be used?
No. Expired thermite powder may have absorbed moisture or degraded, causing unpredictable reaction behavior. Always check the expiry date before use and dispose of expired material according to the manufacturer’s safety data sheet.
Is thermite welding safe indoors?
Thermite welding indoors requires forced ventilation at minimum. The reaction produces significant fumes (aluminum oxide, metal oxides) that can accumulate in enclosed spaces. Confined space thermite welding is prohibited due to oxygen displacement risk and the extreme heat generated.
ForgeSail Products & Support
ForgeSail manufactures aluminothermic welding kits, rail profiles, and rail clips for the rail industry. For the products referenced in this safety guide:
Aluminothermic welding kits— complete kits including crucibles, molds, thermite charges, and ignition systems
Crane rail thermite welding guide— full process specifications and joint preparation
Flash butt vs thermite comparison— technical comparison of both methods
Contact the ForgeSail engineering team for project-specific safety requirements and welding procedure specifications.